How to prepare and resize images for your Squarespace website
You probably already know that you shouldn’t upload really large images to Squarespace, but perhaps you’re not sure exactly what you should do, or what size your images need to be, or whether you need to optimise/compress them. If so, this is the post for you. I’m going to explain step by step what you need to do to prepare your images for uploading and publishing to your Squarespace website, to ensure that they look good AND load quickly and are search-engine-friendly.
Step 1 - edit your images for consistency
Step 2 - resize your images to reduce file size (the most important step!)
Step 4 - upload your images to the Asset Library and organise them
Firstly, you want to make sure that all your images have a similar look and feel. If some are full of bright vibrant colours, while others are muted and dark and moody, it can look very jarring and unprofessional and send very mixed messages about your brand.
If you have downloaded or purchased a range of images from different photographers on different stock photo sites, you will likely find that the editing style and tones differ. I recommend editing them to ensure they have a similar level of brightness and saturation and adjusting the tones so they are consistent.
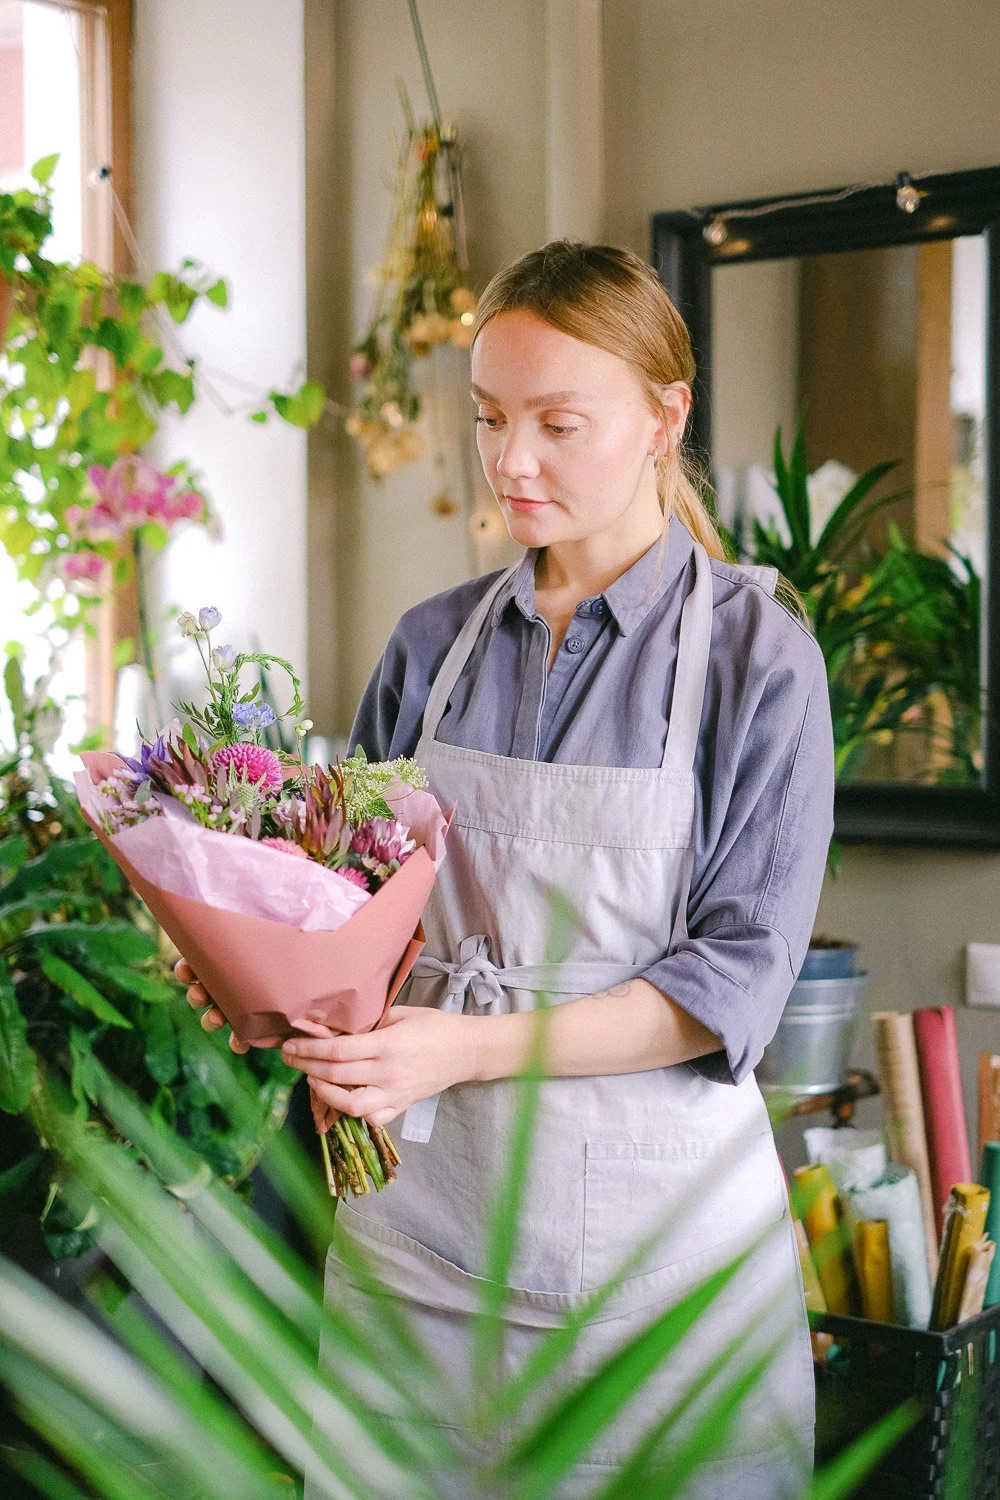
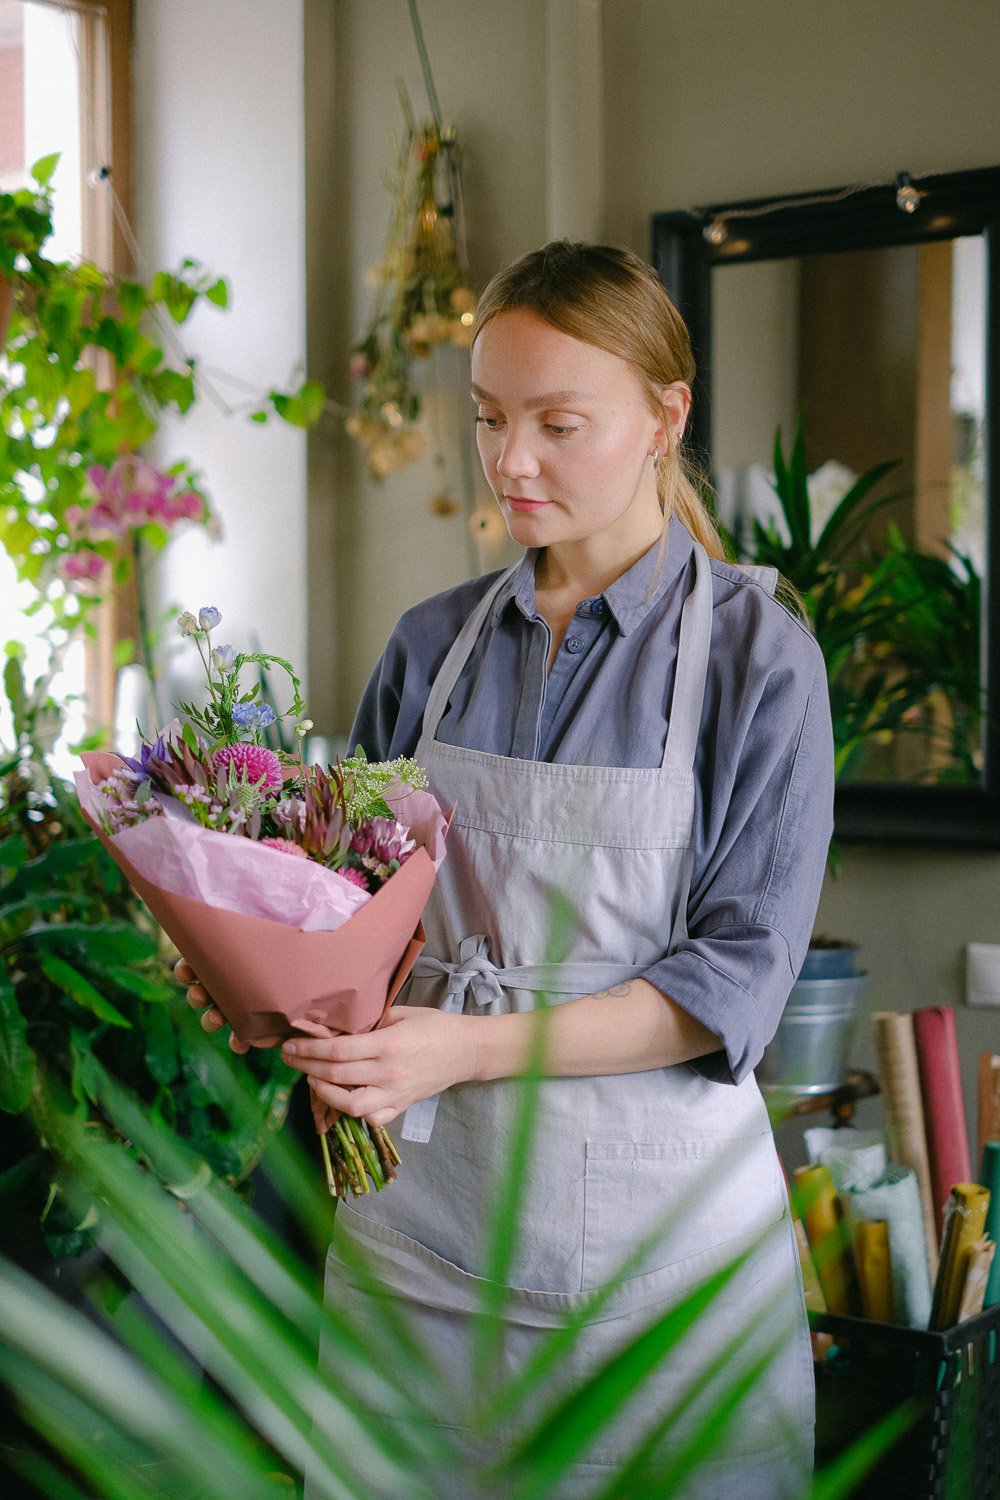
For example, I downloaded the two florist images below from Pexels. They had very different tones and levels of brightness and saturation and didn’t look good when put together. I edited them for consistency, trying to match the tones and brightness, and they now sit together comfortably. A few quick edits can make a big difference. I use Adobe Lightroom to edit photos, but there are many other photo editing applications out there now, including Affinity, which is free.


Why do I need to resize my images?
Large images take a long time to load and display on your website, which means visitors have to wait around (or they don’t wait and they leave and you’ve lost customers) and means that you will likely be penalised by Google and your website won’t rank well in search results. Bear in mind that most web pages have multiple images on them, so once you add up the total file size of all the images, this can really slow things down.
Image formats
A quick note on image formats. You can upload the following file formats to Squarespace: .jpeg, .gif, .png, .webp.
Most of the time your images will be .jpegs. The only exceptions to this are:
images that have a transparent background, for example logo files - these will need to be in .png format to preserve the transparency, and
images with lots of text on them, for example screenshots - these are best saved in .png format to maintain the quality of the text (this can look a bit blurry when saved as a .jpg).
There is no point in uploading .webp files as Squarespace automatically convert all your images into .webp files anyway.
How do I resize my images?
The quickest way to reduce the file sizes of your images is to reduce the pixel dimensions of your images. Let’s look at an example:
Original photo = 6000 x 4000 pixels and 10.4 MB - huge!
Resized .jpg = 1500 x 1000 pixels and 381 KB
Final .webp file created automatically by Squarespace = 137 KB
There are lots of different ways to resize your images.
If you use a Mac, the easiest way is just to locate the image in Finder and double-click it to open it in Preview, then select Tools > Adjust Size… and then type in your desired width or height in pixels. I recommend copying your images into another folder first, so you have the full-size original files, in case you need to resize them differently in the future.
If you use Lightroom, you can choose some more settings. I usually export my photos at 70% quality, with the long edge either 1500 pixels or 2500 pixels, depending on how the image will be used in my website (see below).
If you use a PC, you can use the built-in Photos app to resize your images. Right-click the image in Windows Explorer and select “Open with” then choose Photos. Then click the three dots in the toolbar at the top of your image and select “Resize image” and type in your desired width or height in pixels.
What size should my images be?
It depends on how you are going to display your images:
Banner images that will be the full-width of the screen should be 2500 pixels wide.
They should be a max file size of 900 KB, which will reduce to 315-360 KB when converted to .webp*Most other images that are displayed at half the width of the screen or less should be 1500 pixels on the longest edge.
They should be a max file size of 600 KB, which will reduce to 210-240 KB when converted to .webp*For galleries of images in a portfolio that will be displayed in a pop-up lightbox, I would firstly try 1500 pixels on the longest edge (as above), but you might need to go to 2000 pixels if the quality isn’t good enough (for example for photographers or interior designers where the images are really important). Keep the file size at 700 KB max, which will reduce to 245-280 KB when converted to .webp* files. Bear in mind, though, that if you have a lot of images in your gallery, the cumulative effect of all your images could really slow your page down. It’s always a balance between quality and speed.
If you have a series of testimonials or team pages where the photos are displayed at very small sizes, you could probably get away with 1000 pixels wide.
Logos should usually have a height between 100-300 pixels and a width of between 500-1000 pixels, and a total file size of less than 200KB. But it very much depends on the design of your logo. Logos will usually be .png format to preserve transparency.
Favicons should be 192 × 192 pixels. Favicons are the tiny icon that appears in your browser tab when you are viewing a web page.
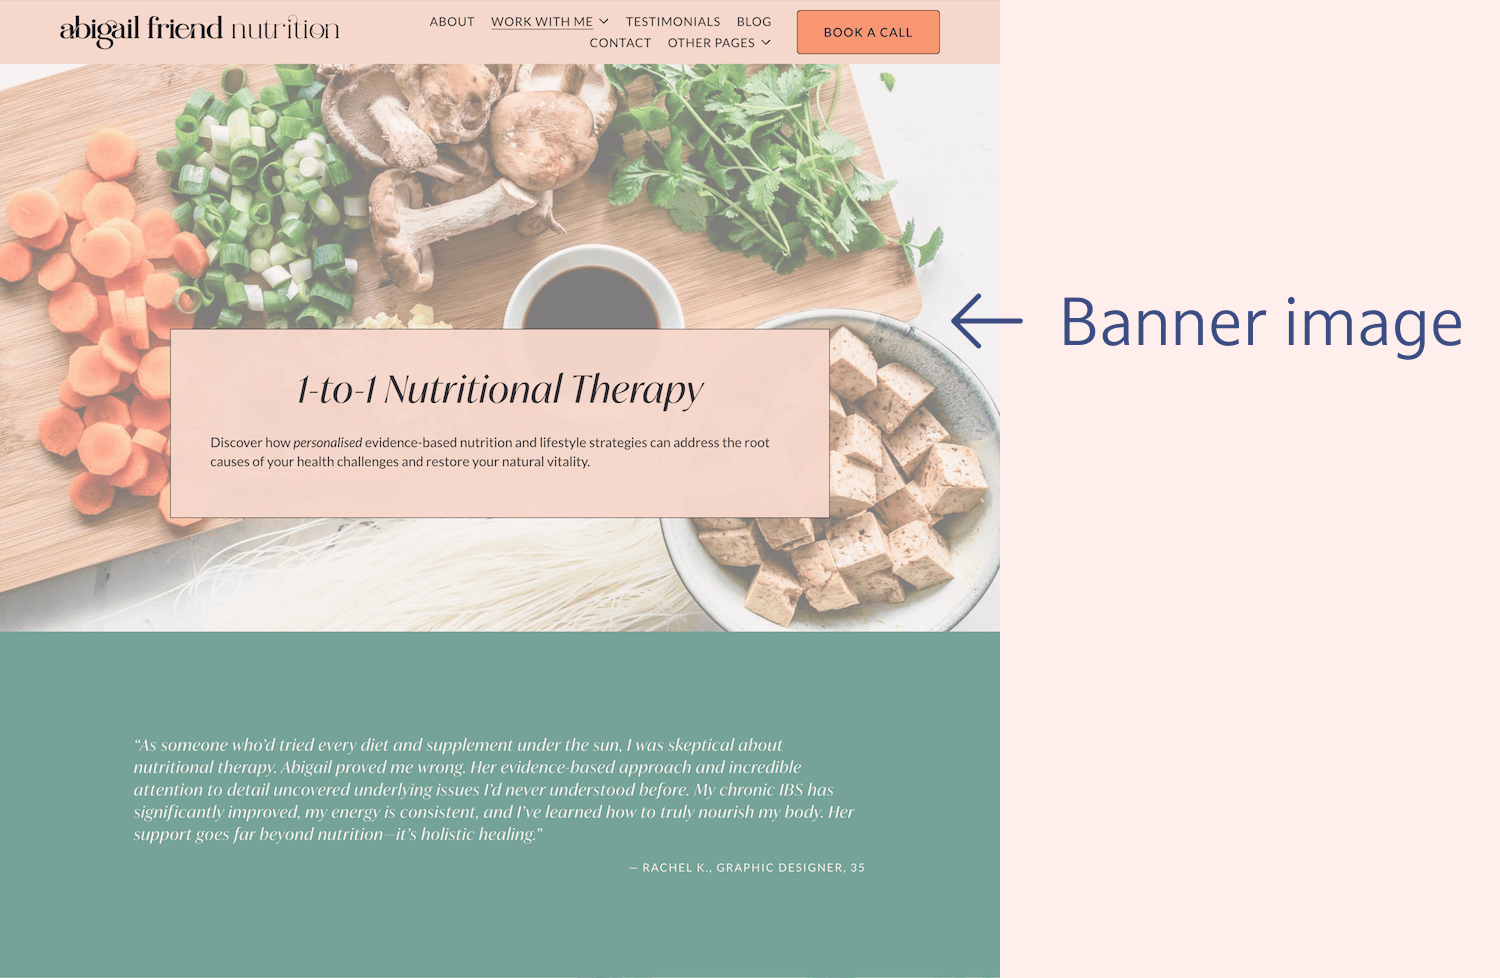
Banner images should be 2500 pixels wide.
They should be a max file size of 900 KB, which will reduce to 315-360 KB when converted to .webp*
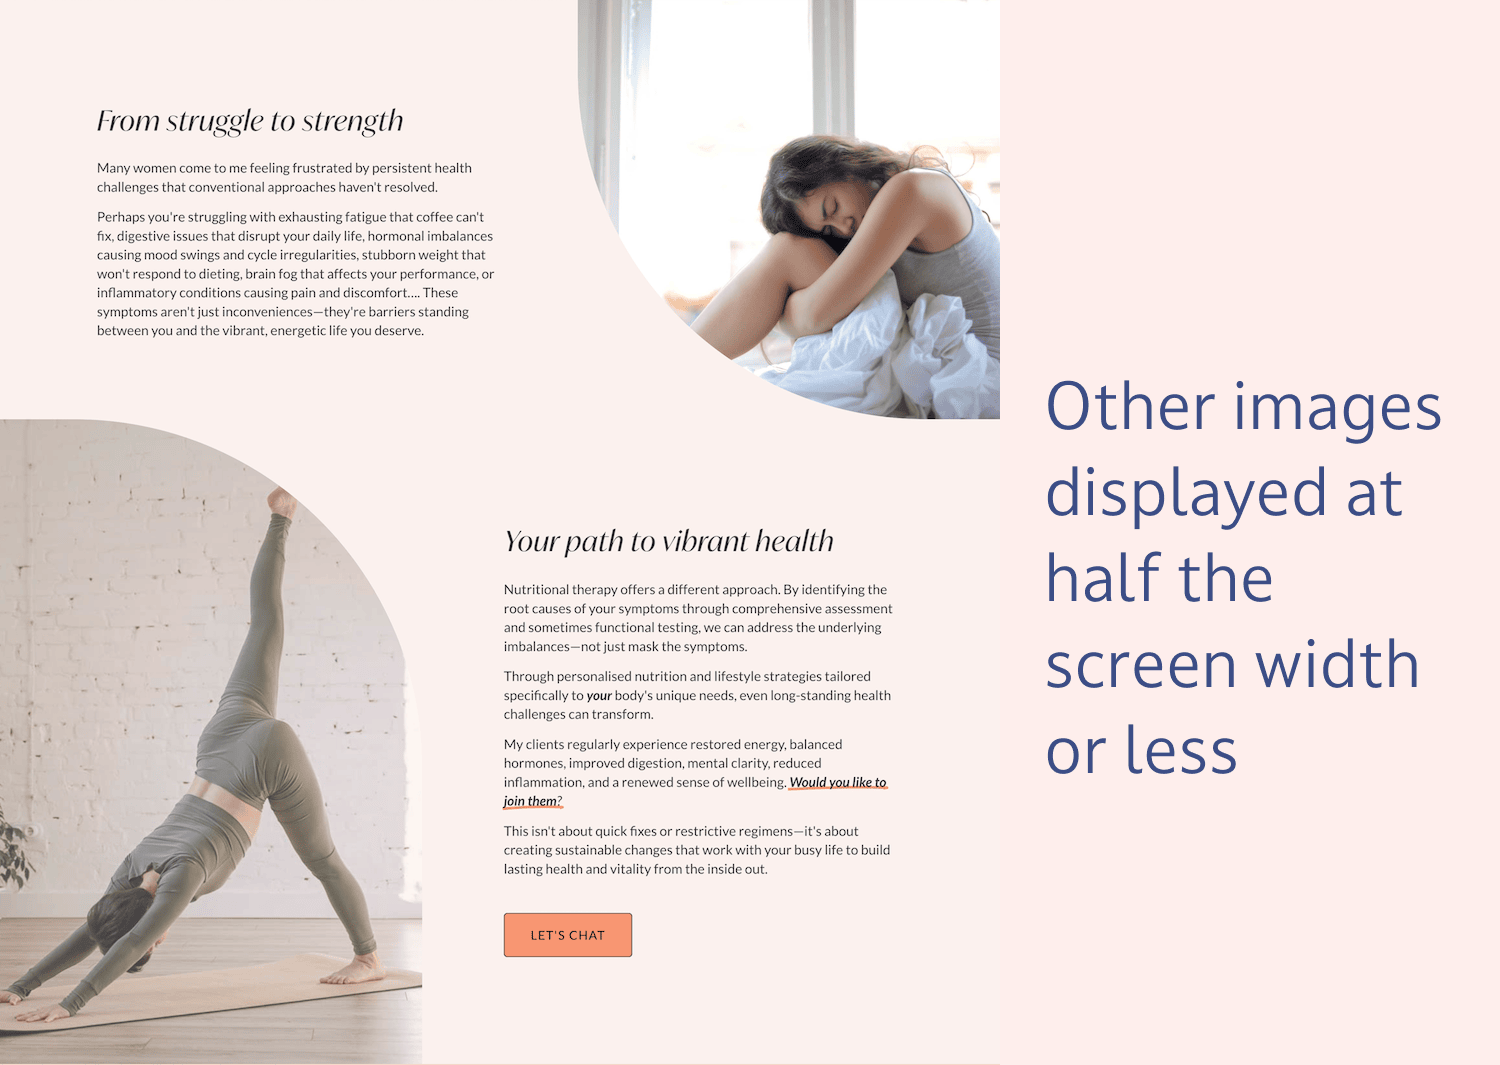
Other images should be 1500 pixels on the longest edge.
They should be a max file size of 600 KB, which will reduce to 210-240 KB when converted to .webp*
Web pages are viewed at lots of different sizes, depending on the device used. For example, most laptops/desktop computers have a browser width of between 1440 - 1920 pixels, with the largest retina screens about 2560 pixels. Most images are only a small part of the web page, therefore there is no need for them to be the same size as the whole page width.
When you upload an image to Squarespace, it creates seven different versions of your image at different pixel widths: 100, 300, 500, 750, 1000, 1500, and 2500 pixels, and serves the most appropriate sized image for the screen size that is viewing your web page.
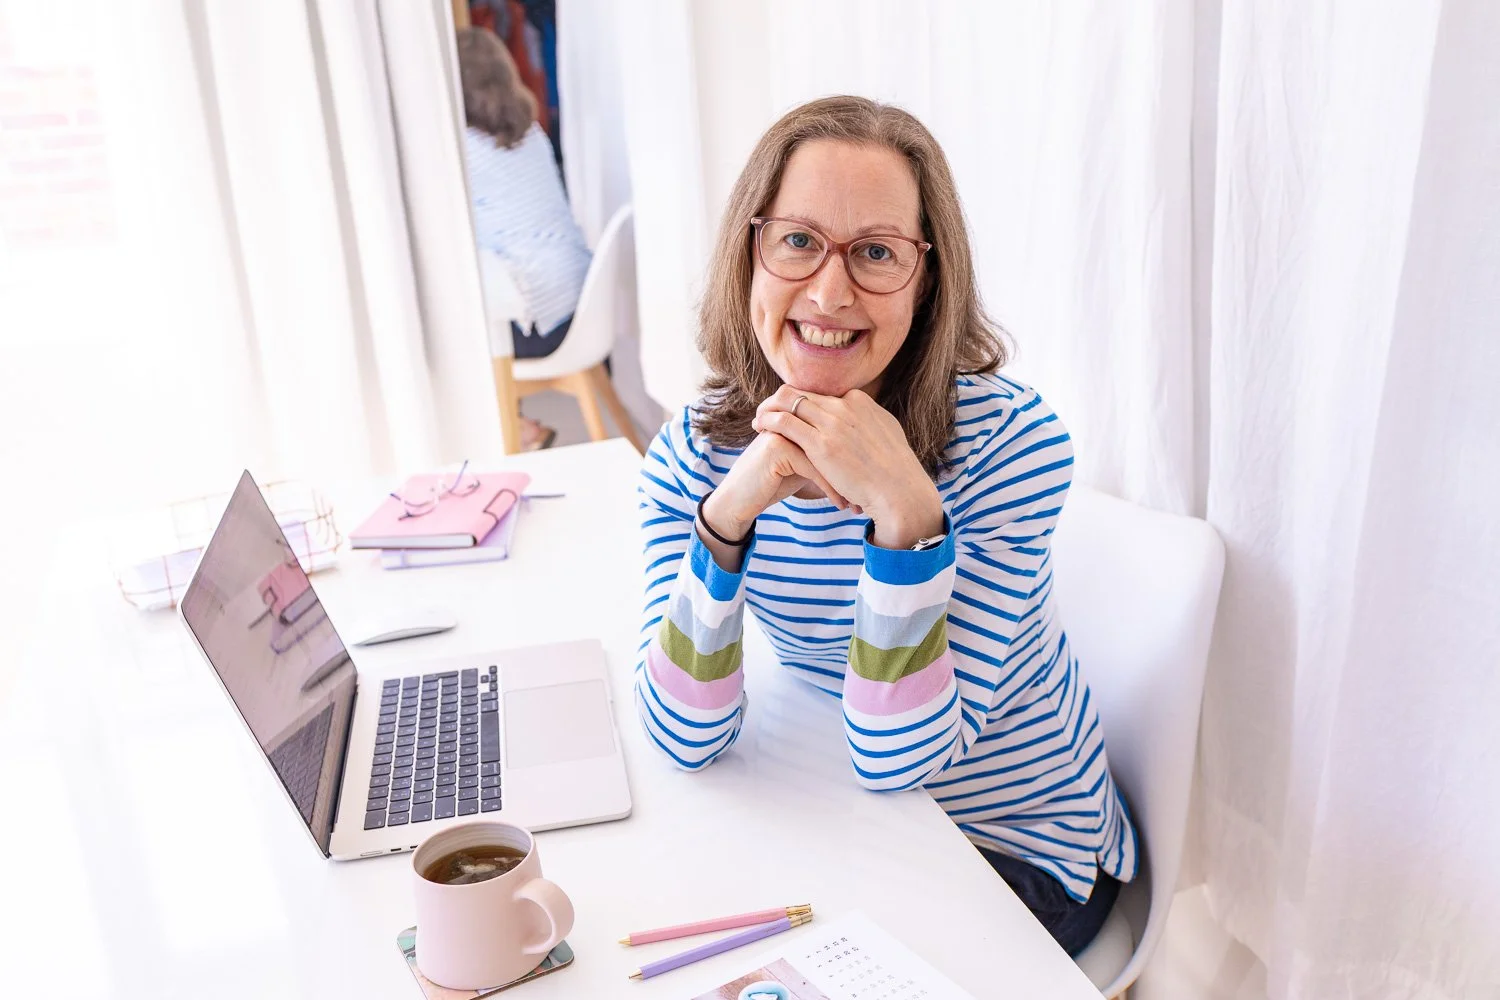
*In addition, Squarespace automatically converts your images to .webp files. Webp files provide a high level of compression, making your file sizes even smaller, while maintaining image quality. In the example photo of me above, I uploaded a .jpeg file that was 381 KB. This got converted to a .webp file of 137 KB by Squarespace.
For more information about file sizes and formats, see the Squarespace Help Article on Formatting images for display on the web.
Do I still need to optimise or compress my images?
In most cases, no, you won’t need to optimise your images, if you are resizing them correctly. This is because they are automatically converted to .webp files by Squarespace, which have a high level of file compression. In all the examples I looked at, the file size was reduced by 60-65% (sometimes more) by converting it to a .webp file. This happens automatically, behind the scenes, so you don’t need to do anything.
If you optimise your files before uploading them to Squarespace, this means they are getting compressed twice, which can affect image quality, and not have much impact on the actual file size.
However, if you find that your banner image .jpeg file is much more than 900KB after you’ve resized it to 2500 pixels wide, then it is worth running it through an image compressor, before you upload it to Squarespace.
My favourite image compression tool is https://compressor.io/. Another popular tool is https://tinypng.com/.
The same applies if your other .jpeg files are much more than 600KB after you’ve resized them to 1500 pixels wide - run them through an image compressor before uploading them to Squarespace. But always check what the image looks like on Squarespace afterwards, to make sure the quality hasn’t suffered too much.
The only time I always run images through a compression tool is when they are large .png files. On my website, I have lots of mock-ups of website designs that contain lots of screenshots of web pages. These files can be huge, so it is necessary to compress them. Also, .png files are converted to a different type of .webp file called lossless, which is designed to maintain image quality, rather than compress the image, so it hardly reduces the file size at all. Jpegs on the other hand, are converted to a “lossy” type of .webp file, which compresses images significantly.
It’s important to rename your image file name so that it accurately and succinctly describes your image and the context. Google and other search engines use this information to understand what the image is about and it can help improve your rank in search results.
I recommend using no more than 5 words, separated by dashes (not underscores) - this helps search engines to read the words correctly. It can be good to work in your keywords, but don’t use the same keyword in all your images as this can be seen as “keyword stuffing” and you could be penalised for it.

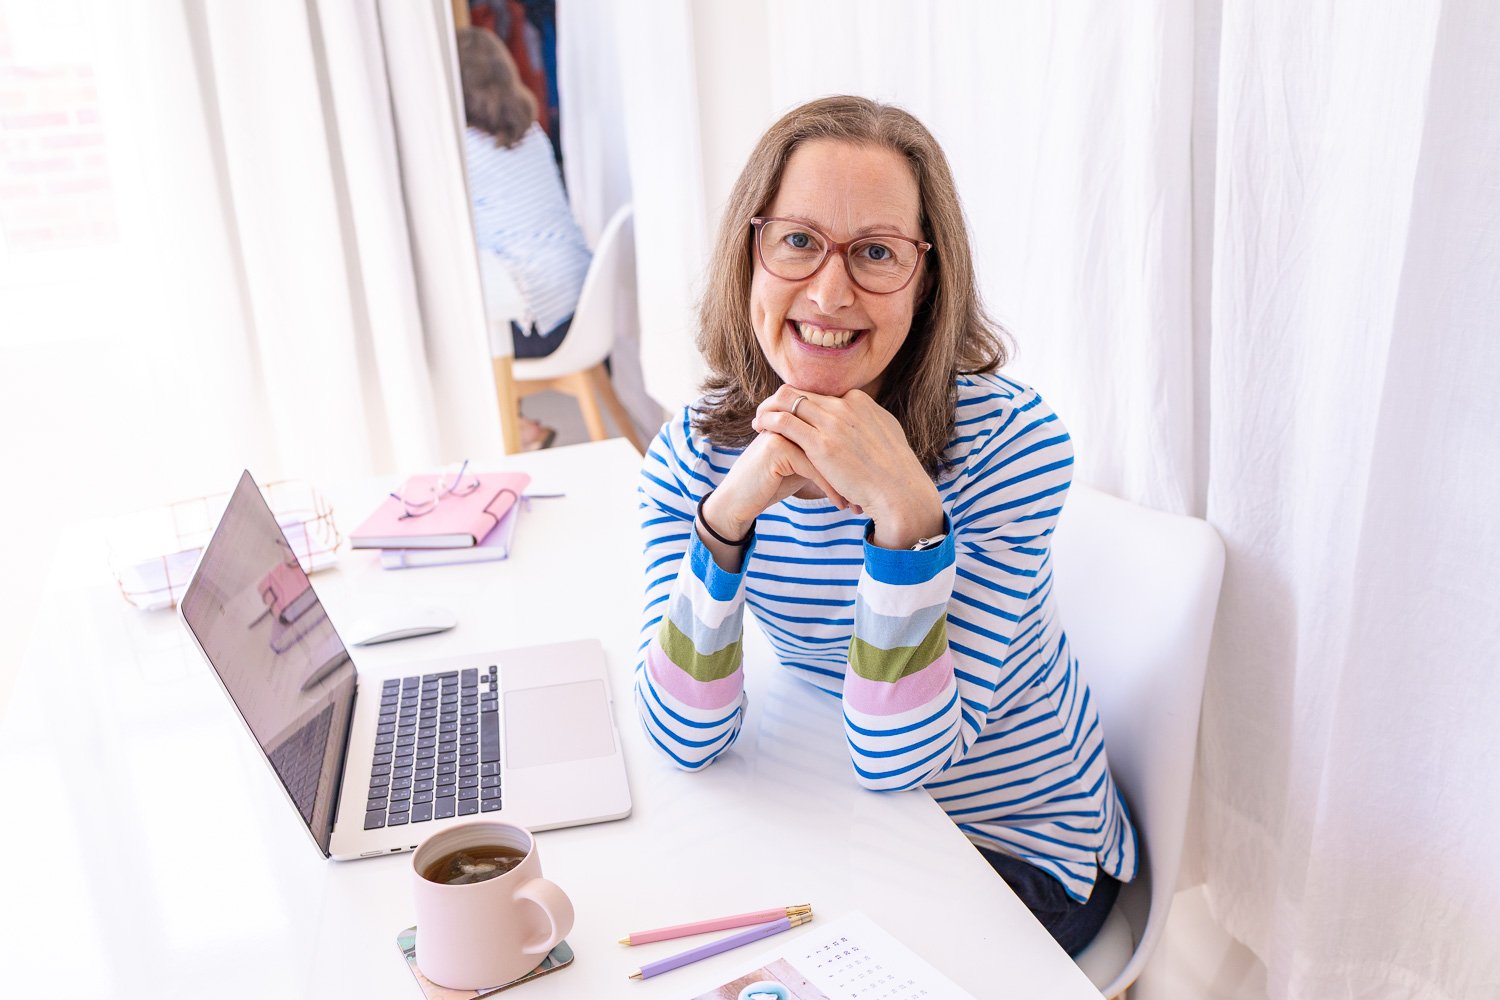
Example image of me from my website
Original file name: IMG_5979.jpg
Better file name = Zoe-Power-Squarespace-Web-Designer.jpg

Example image from a consultant’s website to depict a leadership development workshop
File name = Leadership-Development-Workshop-London
Once you’ve got all your images edited, resized and renamed, it’s time to upload them into the Asset Library in Squarespace.
The Asset Library is basically a storage place for all your images and files. If you have lots of images, it is helpful to organise them into folders to make them easier to find.
To navigate to the Asset Library, click on “Website” in the left-hand menu and then “Assets”. If you’re in the “Pages” area of your website, you’ll find the “Website” link at the top left of your page.
You’ll find the links to Upload files to your Asset Library and Add Folder in the top right of your Asset Library page (see image below). I find it easiest to upload all my files first, and then create whichever folders I need to organise them. To move your files into a folder, tick the box on the top left of each image, then you’ll see a folder icon appear at the bottom of your screen, click this and then select whichever folder you want to move them to.
Once your images are in the Asset Library, you can easily add them into any web page (see below). If you want to use the same image on several different pages, you just upload it once to the Asset Library and then you can insert it on multiple pages. This is much better than uploading the same image lots of times!
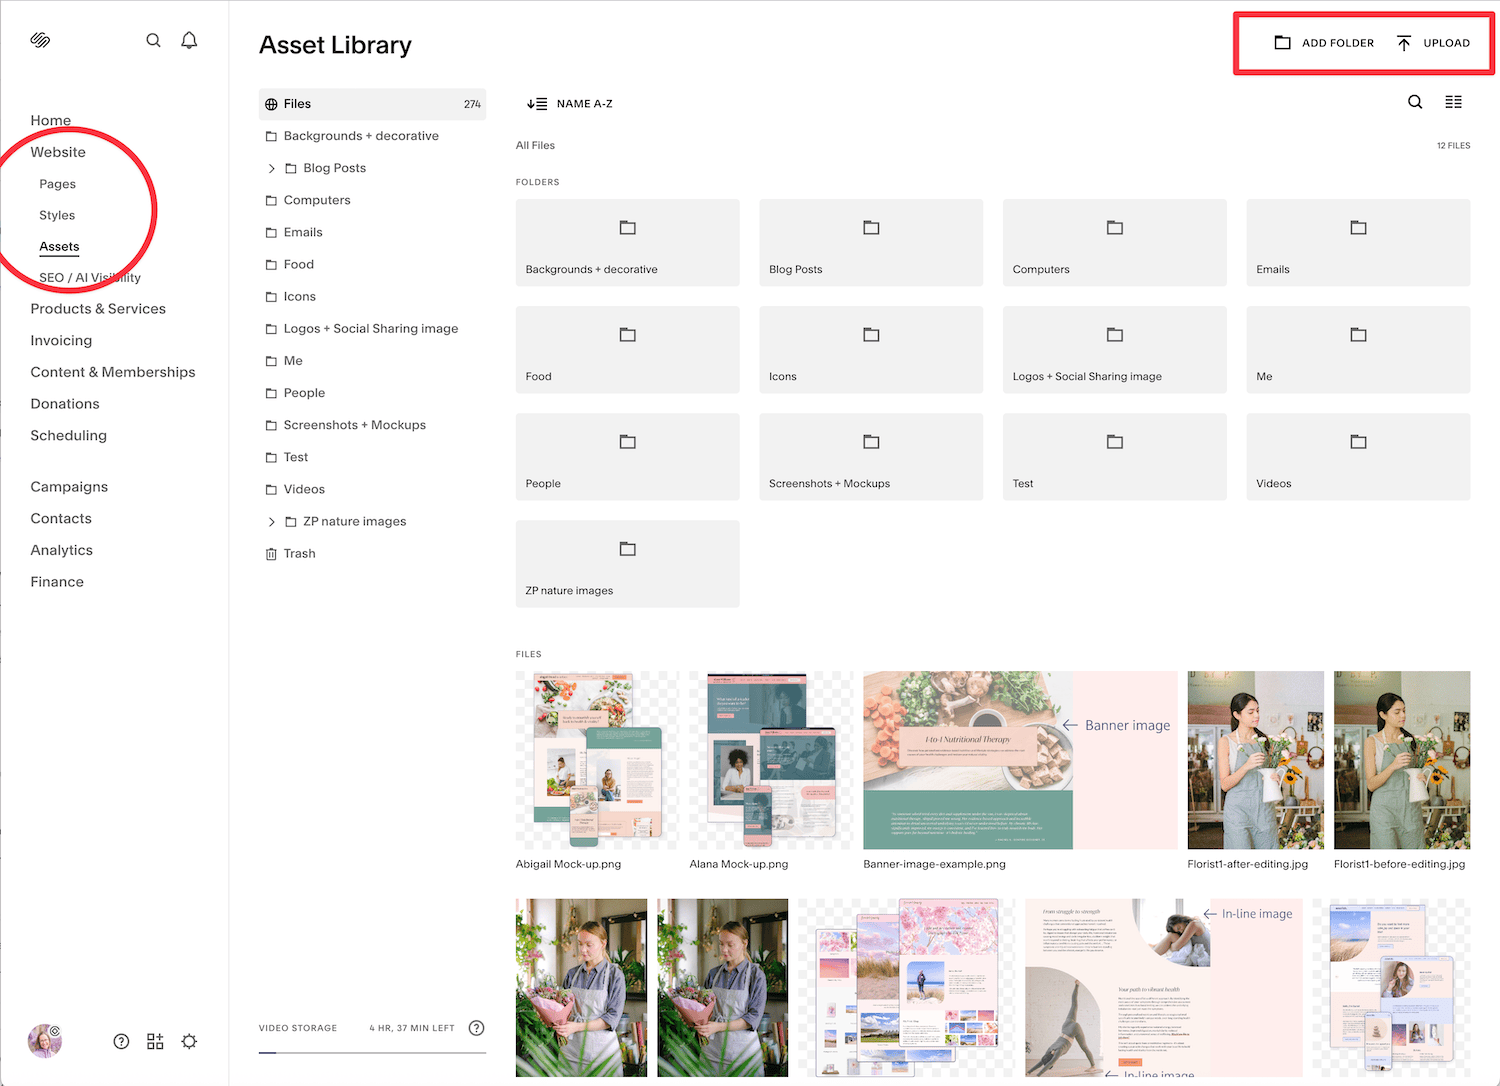
This is a screenshot of my Asset Library, showing the folders I use to organise my images. As you can see, the images I have uploaded for this blog post haven’t yet been moved to a folder - I tend to do this afterwards, as I create the images as I go.
The next step is to add your images into your web pages. Whilst you can upload your images one by one as you add them to your web pages, I find it is easier to bulk add them to your Asset Library first. This means you are less likely to upload the same image multiple times. When you add an image directly to a web page, it automatically goes into the Asset Library anyway. You just have to remember to go back to your Asset Library at some point and organise the images into the relevant folders.
To add an image to your website in Squarespace 7.1, go the relevant page and put it in edit mode, then insert a blank section or go to the section you want to add the image. Hover over the section and click “Add Block” and choose image. This will insert an image block, which you can then resize and drag to the right place on your grid. Then click the + in the centre of the image block and choose “Select from Library” to open your Asset Library. Select the image you want to insert and click Add to add it to your page.
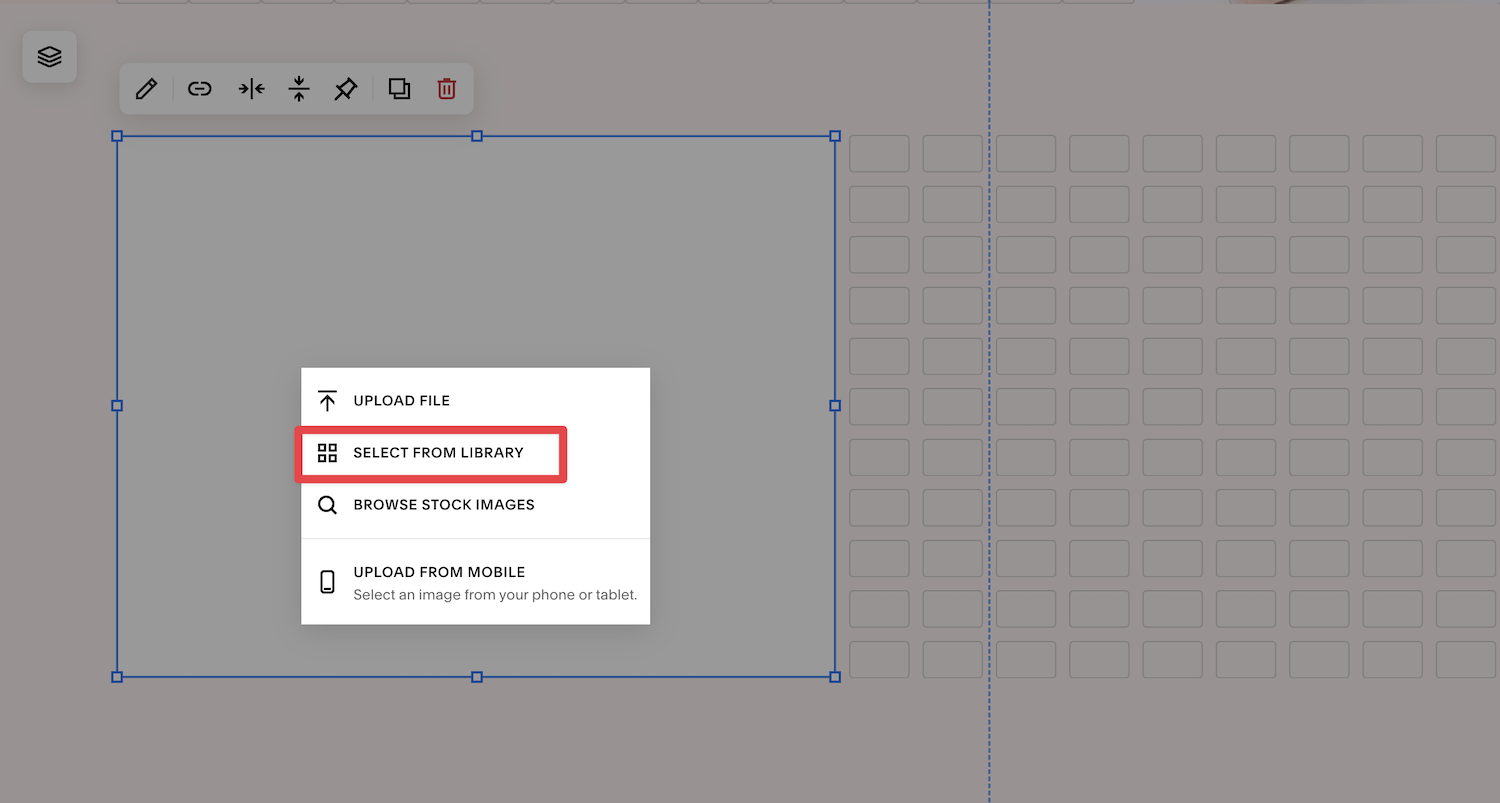
If you haven’t uploaded your image to the Asset Library, choose “Upload file” to add a file from your computer. However, I always think it’s worth checking your Asset Library first, as it’s so easy to add duplicates of the same image otherwise.
I don’t recommend that you choose “Browse Stock Images” from this menu, as it will insert full-size images that are too big and haven’t been renamed. It’s also much harder to search and assess stock images this way. Much better to search for stock images separately, then download them and follow the steps in this post to edit, resize and rename them.
This is the last step, and an important one. Once you’ve added an image to your web page, you need to add the “Alt text”. Alt stands for Alternative and is the text that is read out by screen readers to describe your image to visually impaired visitors to your website. It is also used by Google and other search engines to understand your image and its context as part of ranking your website for search results. Finally, it can also be displayed on your web page if the image doesn’t load for any reason.
Alt text should describe your image, in context of your website.
It is a good opportunity to include your keywords, but avoid “keyword stuffing” and don’t use the same description for multiple images on the same page.
The text should be short - about 150-200 characters.
There is no need to use hyphens, just write in real sentences. You don’t need to say “photo of” - just get straight to the description.
Let’s look at some examples, using the same images as earlier:
Alt text:
Zoe Power, Squarespace Web Designer UK, sat at her desk with laptop

Alt text:
Group of employees at leadership development workshop in London
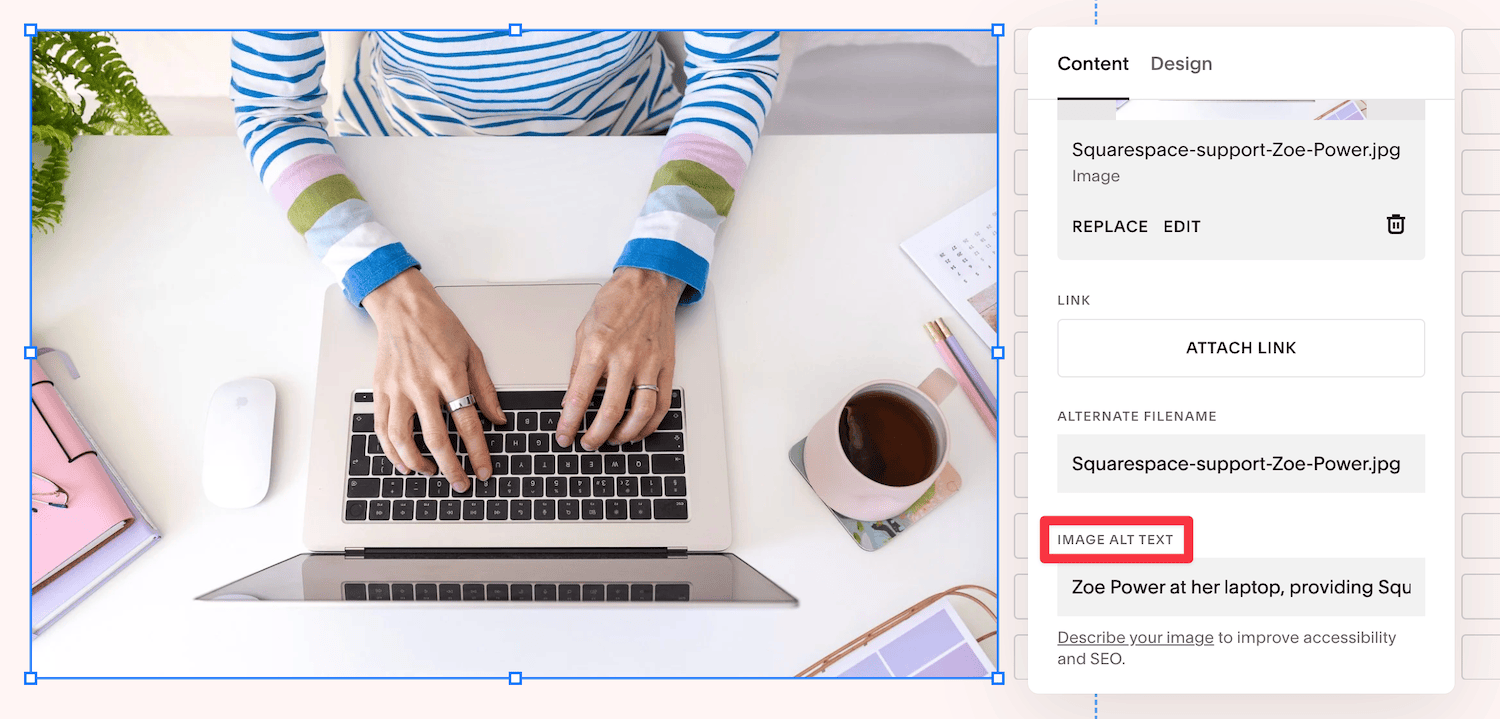
To add Alt text to your image, click your image, then the pencil icon to open the image block editor. Make sure you’re on the Content tab, then scroll down and you will see a field for Image Alt text - enter your description here. You can also enter a different file name if you forgot to rename your file before uploading it. It’s worth noting that there is no save button - your Alt text just saves automatically. Just click anywhere outside the pop-up form and it will save.
As well as adding Alt text to images using the image block (as above), you can also add Alt text to images in auto layouts, gallery sections, gallery blocks, and products, although the method differs slightly for each. To find out how to add Alt text to these types of images/blocks, see the Squarespace help article on Adding Alt text to images.
One type of image you can’t add Alt text to, is background images. This is by design, as purely decorative images like abstract background images don’t need descriptions, as they aren’t deemed important to screen readers, as they’re not needed to understand the page.
That’s it - the final step for preparing your images for publishing on your Squarespace website. Congratulations on making it to the end!
Here’s a quick recap:
Step 1 - edit your images for consistency
Step 2 - resize your images to reduce file size (the most important step!)
Step 4 - upload your images to the Asset Library and organise them
Feeling daunted by preparing your images and want some help?
I promise this process becomes easier, the more you do it, and will soon be second nature. However, if you would like some help with preparing your images, or any part of the website design process, then please get in touch. I provide help to all my website design clients with preparing images, but you can also book me by the hour to help with specific tasks. If you’ve got lots of images that need editing and resizing, just get in touch and let me have some more details and I’ll give you a quote and timeframes for the work.
↓ Save this post to Pinterest ↓